
Updated with new information! Do your dried chickpeas cook up too mushy? Or not at all? No problem! This ultimate guide shows how to cook perfect chickpeas every time, whether you use the stovetop, slow cooker, or an electric pressure cooker, such as the Instant Pot.
Included are recommendations for soaking and salting, and solutions to common problems, so that you get a perfectly tender and flavorful bowl of chickpeas at the end.
Jump to Recipe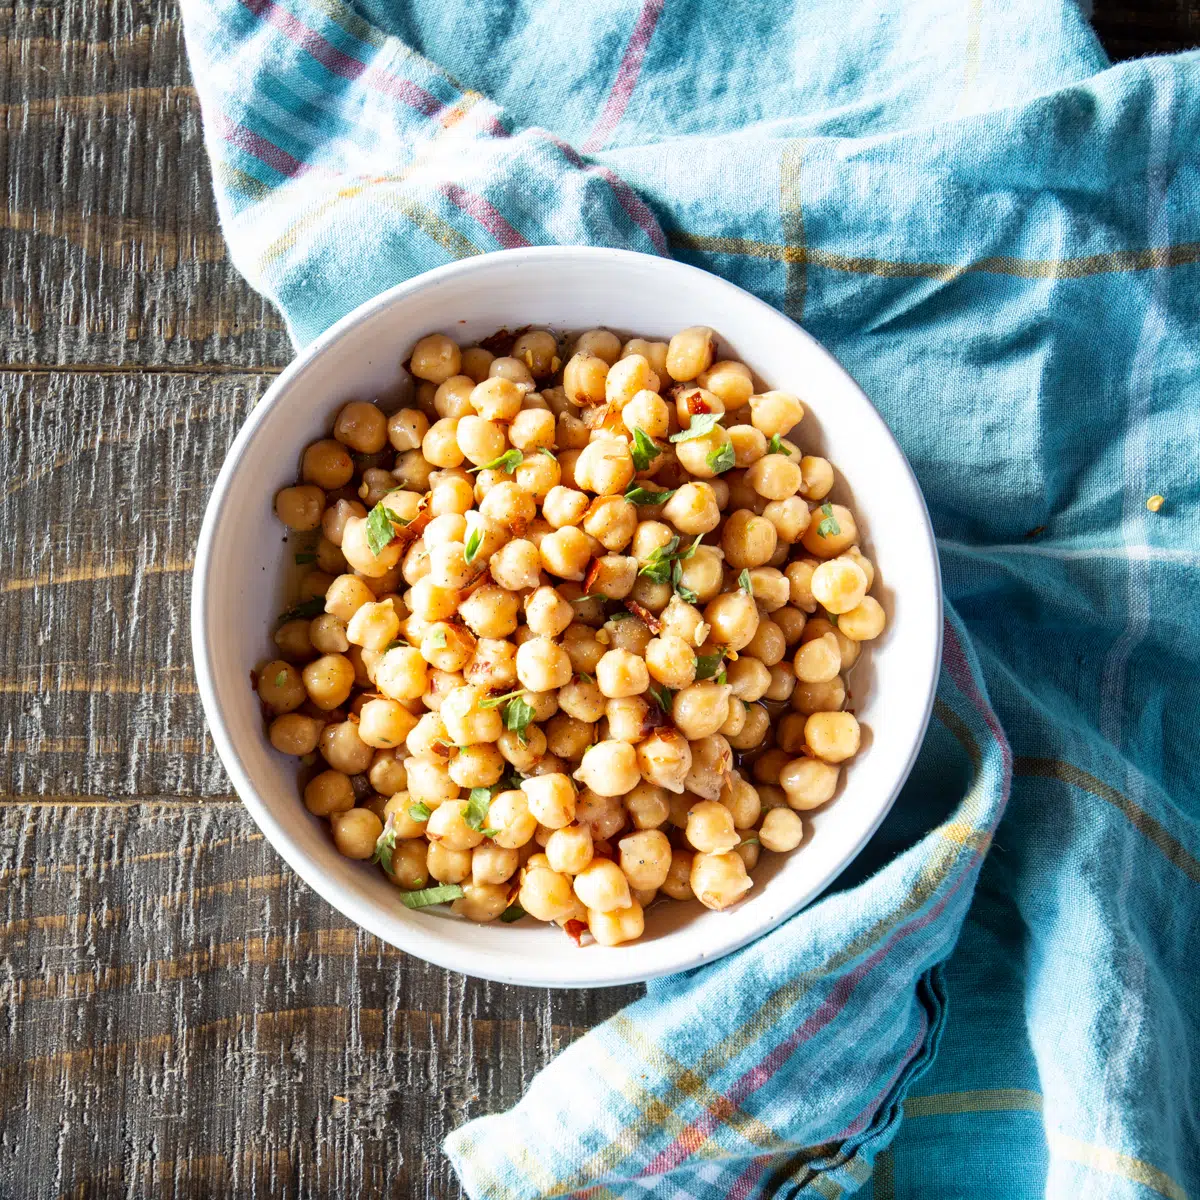
Chickpeas are an excellent source of protein for vegan and vegetarian diets, and are a great thing to have on hand when deciding to move to a more vegetarian diet. They have many uses ranging from salads, curry, soup, and pasta, to snacks, hummus, and recipes that use chickpea flour.
Jump to:
- 🙋♀️ Chickpeas vs. garbanzo beans. What's the difference?
- 🌱 What are the types of dried chickpeas?
- 🏆 What are the BEST dried chickpeas?
- 🛁 Do you have to soak chickpeas before cooking them?
- 👩🍳 What's the best way to soak chickpeas before cooking?
- ⏰ Does adding baking soda make dried beans cook faster?
- 🧂 When is the best time to add salt when cooking dried chickpeas?
- 👩🍳 How many cups cooked chickpeas will 1 cup dried chickpeas make?
- ⏰ How long does it take to cook chickpeas?
- 🧄 Ingredients
- 🔪 Equipment (Stovetop and Oven Methods)
- 📝 Instructions - Stovetop and Oven
- 🪨 Why won't my dried chickpeas soften?
- 🌶 Ways to infuse flavor into chickpeas
- 🧊 What's the best way to store cooked chickpeas?
- 📇 Recipes with chickpeas
- How to Cook Dried Chickpeas (Recipe)
I sometimes use canned chickpeas for convenience, but they're never quite as good as the ones I cook up myself.
But before you starting cooking a pot of chickpeas, or any other bean, there are decisions to be made. Which chickpeas should you buy? Will you pre-soak the beans? Will you salt the water? All this is covered below. First, a little information about this mighty legume from the pea family.
🙋♀️ Chickpeas vs. garbanzo beans. What's the difference?
Chickpeas and garbanzo beans are the same thing. These are just two different names for the most popular legume in the world. They were first farmed around the Mediterranean Sea, and the name garbanzo bean has Spanish and Portuguese background. Chickpea is the most common term in the United States, and most other places.
🌱 What are the types of dried chickpeas?
There are are few types of dried chickpeas you may run into. They all carry various names, depending on where in the world you happen to be. But you cook them all the same way.
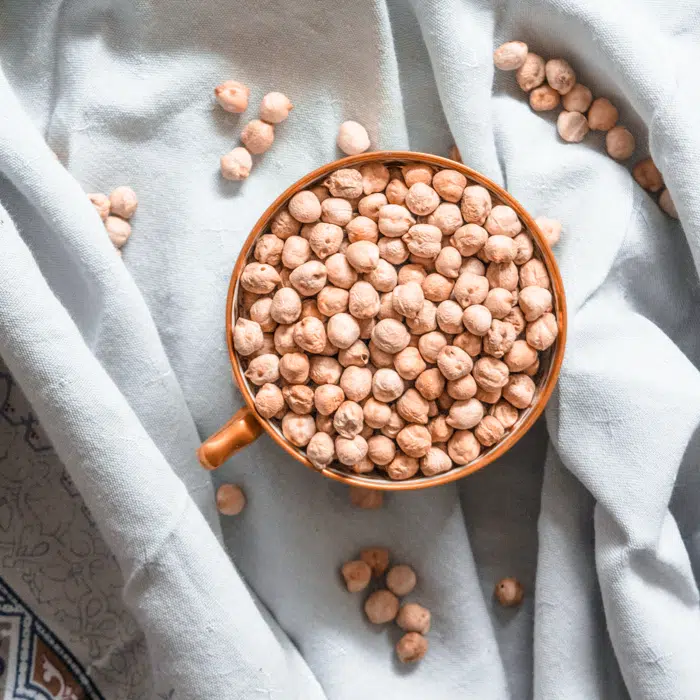
#1. Kabuli. This is the tan chickpea we most commonly see in markets, restaurants and recipes.
#2. Desi chana. Also called black chickpeas, this chickpea is smaller than kabuli chickpeas, and can be black, green or speckled. They have a subtle smoky flavor, and can be purchased on the Chili Smith website.
#3. Ceci Sultano. Also called the Umbrian Chickpea, this chickpea looks like a miniature kabuli chickpea, and has a slightly nutty flavor. It has a thinner skin, and therefore doesn't need to soak or cook as long as its larger cousin.
🏆 What are the BEST dried chickpeas?
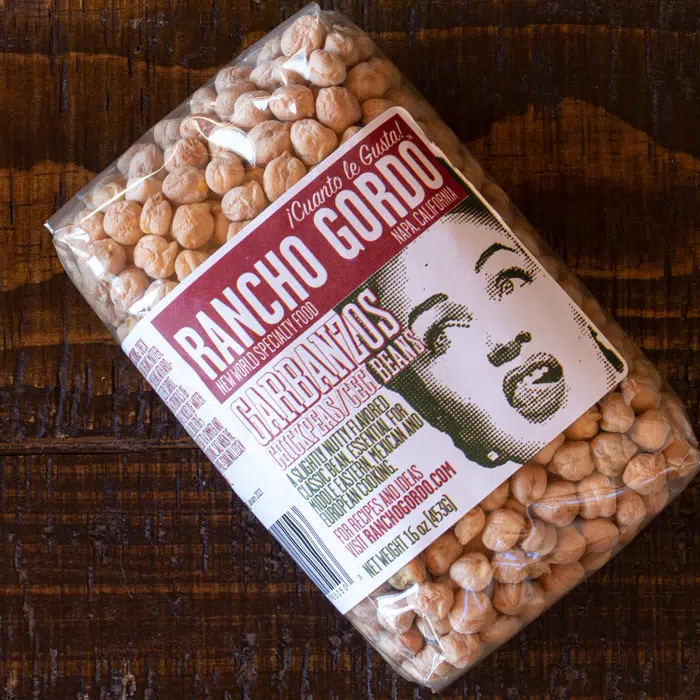
Heirloom chickpeas, hands down, are the best. There are good reasons for purchasing heirloom beans. They taste better, are fresher and more digestible. And a fresher bean means they cook a little faster, and reduces the chances of getting beans that just won't soften.
Also, there's a much wider variety to choose from when purchasing heirlooms.
I order all my beans from Rancho Gordo and Chili Smith, and highly recommend both.
🛁 Do you have to soak chickpeas before cooking them?
It is not absolutely necessary to pre-soak chickpeas before cooking them. But I highly recommend at least a quick soak for 3 reasons:
- Soaking chickpeas in a brine solution improves their flavor by 1000% (seriously). It's night and day.
- Pre-soaking helps to prevent the beans from splitting open while they cook, and generally ensures a better texture.
- Soaking the dried chickpeas reduces their cooking time. A quick soaked chickpea cooks at least 2 hours faster on the stovetop, and about 20 - 25 minutes faster with the Instant Pot.
In addition to speeding up the cooking time, soaking helps prevent beans from splitting during cooking, improves their texture, and greatly improves the flavor.
The exception is, I don't usually pre-soak my bean before sliding them into my slow cooker, since this is essentially a long soak method.
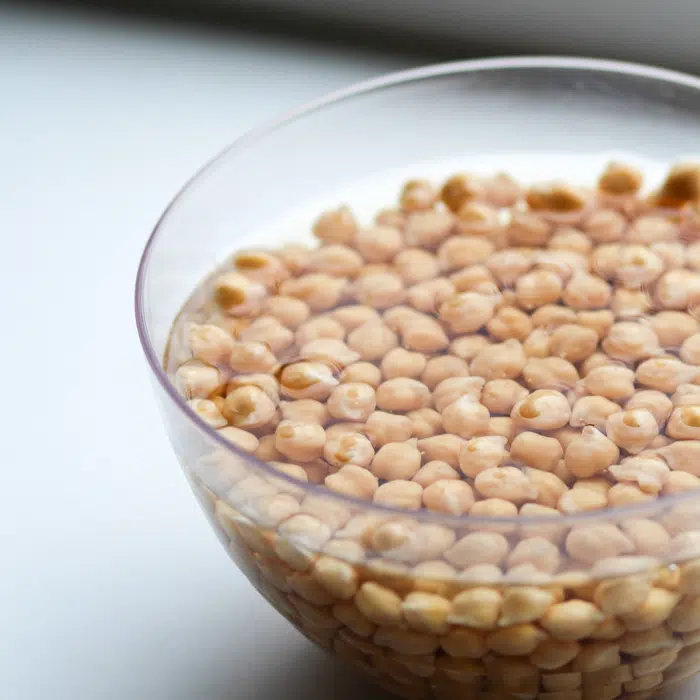
👩🍳 What's the best way to soak chickpeas before cooking?
There are a 2 main soaking methods: an Overnight Soak and a Quick Soak. I use both methods, but use the Quick Soak any time I don't remember to soak beans overnight. (Which means most of the time.)
Cook the beans the same way for roughly the same amount of time when using either soak method. Details are in the Cooking Time section.
Overnight Pre-Soak Instructions
- Spill the beans (so to speak...) into a heavy bottomed pot, such as a Le Creuset Dutch oven.
- Cover with 2 inches of water (about 1 quart for 1 cup of dried chickpeas).
- Stir in 1 tablespoon kosher salt for every 1 cup of dried chickpeas (or half that amount of table salt) to create a brine solution. Cover and soak overnight.
- Drain and rinse the beans before cooking.
Quick Soak Method
- Pour the beans into a heavy bottomed pot such as a Le Creuset Dutch oven.
- Cover with 2 inches of water (about 1 quart for 1 cup of dried chickpeas).
- Add 1 tablespoon kosher salt for every 1 cup of dried chickpeas (or half that amount of table salt). Cover and bring to a boil. Reduce the heat and simmer for 10 minutes.
- Remove from the heat and allow to cool for 1 hour.
- Drain and rinse the beans.
⏰ Does adding baking soda make dried beans cook faster?
Yes. Adding ¾ teaspoon of baking soda for every cup of dried beans to the brine (soaking water) can cut the cooking time by roughly 40%.
Baking soda helps to dissolve the cellular walls of beans. but be sure to thoroughly rinse the beans before cooking in fresh water.
Be careful when adding baking soda. You only need ¾ teaspoon for every cup of chickpeas, or 1 ¾ teaspoons per pound of chickpeas. This can reduce the cooking times by as much as 40%.
Note: You may notice a chemical taste when using baking soda in the water. However, if other flavors will be added to the chickpeas in the final dish, it will not likely be noticeable.
🧂 When is the best time to add salt when cooking dried chickpeas?
This is controversial, and cooks around the world steadfastly swear by either salting chickpeas before, during or after they cook. I am no different.
Chickpeas (and all legumes) greatly benefit from pre-soaking in a brine solution of 1 tablespoon kosher salt per 1 cup dried chickpeas. These benefits are compounded by adding 1 teaspoon of kosher salt per cup of dried beans during cooking. (Use half that amount when using sea salt.)
If your beans aren't softening, it's for a reason other than salt. Check out the below section "Why won't my dried chickpeas soften?" for more information on this.
👩🍳 How many cups cooked chickpeas will 1 cup dried chickpeas make?
The rule of thumb I use for all dried beans is that 1 cup of dried chickpeas will yield 3 cups cooked chickpeas.
⏰ How long does it take to cook chickpeas?
There are 4 main ways to cook chickpeas, and each method has its own advantages and negatives. The primary difference between them is the amount of time each method requires.
The estimated cook times below are with heirloom chickpeas purchased from Rancho Gordo. Dried chickpeas at the market may take up to 20% longer.
The length of cook time will depend on the age of the dried chickpeas, whether they were pre-soaked, the hardness of your water, and type of cooking pot you use. My stovetop is gas, and have not testing them using electric or induction stovetops.
#1. Stovetop
Quick Soak: Simmer for 1 hour and 30 minutes.
Overnight Soak: Simmer for 1 hour and 15 minutes.
No Soak: Simmer for 2 hours and 45 minutes.
The water needs to stay at a low simmer, and foam should be removed, so there's some hand-holding involved with this method.
(All the details for this cooking method are below.)
#2. Oven
Same timing as Stovetop.
The foam should still be removed in the first 10 minutes on the stove, but this method requires less handholding than the stovetop method once you slide the pot into the oven.
(All the details for this cooking method are below.)
#3. Slow Cooker
No Soak: Cook on HIGH for 3 - 3 ½ hours, or on LOW for 6 - 7 hours.
I generally don't pre-soak chickpeas before cooking them in the slow cooker since I'm using a slow cooker method because I don't want the chickpeas to cook too quickly. And since they'll be cooking for quite a while, flavors can easily be infused during cooking.
But if you want do an overnight soak, I've been able to cook chickpeas in the slow cooker on HIGH for 2 hours.
This is a great hands-off way to cook any kind of bean while you run errands, go skiing, or go to work.
Read this post on how to cook chickpeas in the slow cooker for more details and tips.
#4. Electric Pressure Cooker
Quick Soaked: Cook for 15 minutes high pressure + 15 minutes natural release.
Overnight Soaked: 10 minutes high pressure + 10 minutes natural release.
No Soak: 50 minutes high pressure + 20 minutes natural release.
This is the fastest method by far, and is also very hands-off.
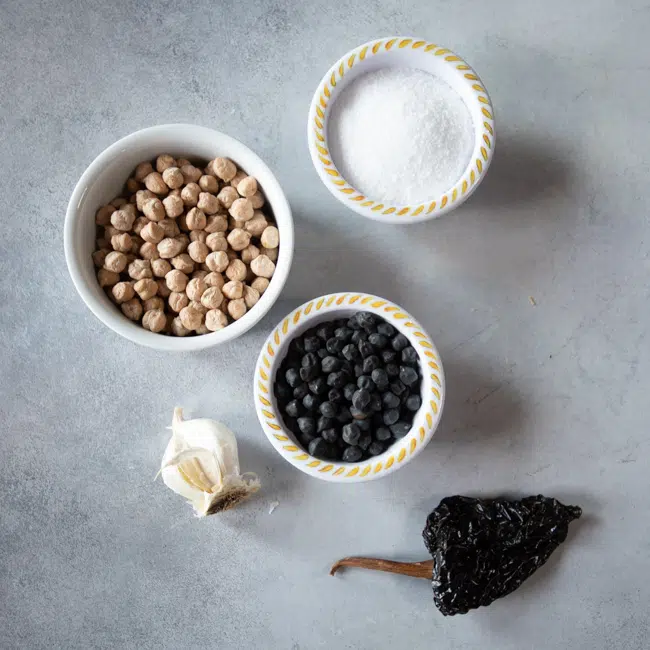
🧄 Ingredients
- Dried Chickpeas - preferably heirloom chickpeas.
- Water or Broth
- Kosher Salt - for pre-soaking AND cooking
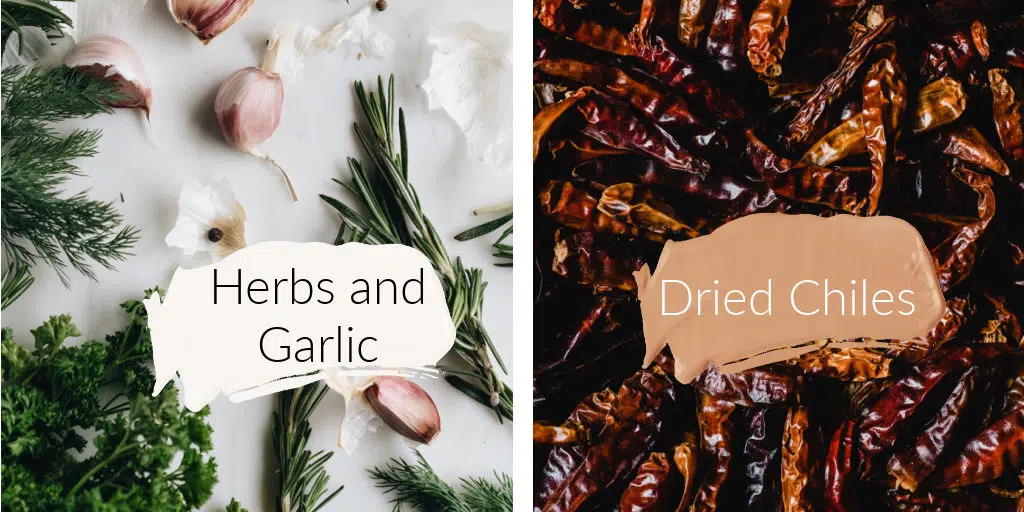
- Garlic (optional)
- Dried Chiles (optional)
Disclosure: This post may contain affiliate links to products and foods I use in my kitchen. This means that at no additional cost to you, I will earn a commission if you click through and make a purchase. To view my entire storefront of recommended kitchen tools and equipment, check out my shop on Amazon.
🔪 Equipment (Stovetop and Oven Methods)
- Baking Sheet - to inspect dried chickpeas and pick out stones, etc.
- Heavy bottomed pot - for soaking and cooking
- Colander - to strain the chickpeas after soaking and cooking
- Large metal spoon - to skim any foam from the top when cooking on the stove.
📝 Instructions - Stovetop and Oven
Follow these instructions for your best pot of cooked chickpeas cooked on the stovetop or in the oven. There are details in the recipe card as well.
Step 1
Sort. Spread the dried chickpeas out on a baking sheet. Pick out and discard any seriously damaged legumes and stones.
Step 2
Pre-Soak. Follow the instructions in the above section for either a quick soak or overnight soak in brine. Drain and rinse well.
Step 3
Cook the chickpeas. Place the drained beans back into the same pot. Add enough water or broth to cover them by at least 3 inches. Stir in 1 teaspoon kosher salt (½ teaspoon table salt) for every cup of dried chickpeas you started with.
(Soaked chickpeas will be at least twice the size of the original dried chickpeas.)
Step 4
Infuse flavors (optional). Add herbs, chiles or mirepoix for infusing flavor, if using. (See below section Ways to Infuse Flavors into Chickpeas for flavor tips.)
Step 5
Remove foam. Bring the pot to a boil, and then reduce to a simmer. Foam may develop in the first 20 minutes of simmering, and sporadically while the beans cook. I find this particularly true for dried chickpeas purchased at my local market, but rarely when I use heirloom beans.
Remove the foam by skimming the top of the water with a large metal spoon.
The foam negatively affects the texture of the cooked chickpea, and promotes splitting.
Tip: Place a small bowl of water next to the stove. After skimming some foam off the top, dip the spoon into the bowl of water. This easily removes the foam from the spoon, readying the spoon for another scoop of foam.
Step 6
Cook. Either continue to simmer on the stovetop until the chickpeas are tender, or cover and slide the pot into a 350˚F preheated oven to continue to cook.
The oven method creates a more even cooking since all surfaces of the pot are evenly heated. But the cooking time will be approximately the same.
Step 7
Check beans for doneness: Spoon out a bean and cut it in half. It should be firm but tender, and a consistent color and texture through the thickness of the bean. If you bite into it, it should have a little bite to it, similar to al dente pasta, but not hard nor mushy.
Step 7
Final soak (optional). When the chickpeas are done, turn the stove off, cover the pot, and allow the chickpeas to completely cool in the leftover broth. This last soak isn't critical, but it promotes a creamy texture.
Drain and discard vegetables that were added for flavor.
🪨 Why won't my dried chickpeas soften?
Have you done everything according to the book, and sometimes still end up with beans that won't soften? This is one of the most common complaints from home cooks. There are a few possible reasons:
- Dried chickpeas that are old. Chickpeas on the shelves of your local market could be as much as 2 or 3 years old. Think of them as potentially super-dried chickpeas. The older they are, the drier they are, and the longer it takes for them to soften.
- Solution: Heirloom dried beans, are typically much fresher. Both Rancho Gordo and Chili Smith heirlooms are great options.
- Hard water. This means you have a high mineral content in your water. These minerals can leave deposits on the beans, preventing them from softening .
- Solution: Cook them in store-bought vegetable broth or bottled water.
- Acid. Never add anything acidic to the water when soaking or cooking chickpeas. For example, tomatoes or lemon juice.
🌶 Ways to infuse flavor into chickpeas
Herbs
Most delicate herbs will fall apart during cooking, but a bay leaf is a great addition. If you choose to add more delicate herbs, wrap them in cheesecloth before adding them to the pot. This holds them together better, and makes them easier to remove at the end.
Dried Chiles
Add 1 dried ancho, guajillo or chipotle chile to the cooking water, or a couple arbol dried chiles. I keep all on hand, and like this collection of dried chiles in resealable bags.
Mirepoix
Add ½ cup chopped celery, ½ cup chopped onion, ¼ cup chopped carrot, and 3 large smashed garlic cloves to the stock water you will use for cooking the chickpeas. Sauté the mirepoix before adding to the stock water for added flavor.
I recommend wrapping the mirepoix in cheesecloth before adding it to the pot to make the veggies easier to remove at the end.
🧊 What's the best way to store cooked chickpeas?
Completely cool the beans, and refrigerate in jars or other airtight container for up to 4 days. Or freeze up to 6 months in a freezer-safe container.
Before freezing, be sure the beans are completely cooled and dry. This helps prevent ice crystals from forming on the beans. You can dry them be either 1) using a towel, 2) leaving them out to dry naturally, or 3) placing them in a warm oven.
Note: If you use a towel, it will remove some of the skins. This is perfectly normal and nothing to worry about. Just discard the skins.
📇 Recipes with chickpeas
Now that you have a batch of perfectly cooked chickpeas, here are some ways to use them.
SIMPLE CHICKPEA SALAD WITH OLIVES
MEDITERRANEAN CAULIFLOWER SALAD WITH CRISPY CHICKPEAS
PAN-FRIED CHICKPEA SALAD IN A CURRIED YOGURT DRESSING
How to Cook Dried Chickpeas (Recipe)
Equipment
- baking sheet
- Dutch oven or other heavy-bottomed pot
- Colander
Ingredients
- 1 cup dried chickpeas
- 4 teaspoons kosher salt, divided (or half that amount of table salt)
- 3 garlic cloves peeled (optional)
- 1 dried chipotle pepper (optional)
Instructions
- Inspect the Beans. Spread one cup dried chickpeas on a baking sheet and remove any stones, damaged beans, or other grit. Place the beans in a colander and rinse.
- Pre-soak beans in a brine solution. Pour the beans into a heavy bottomed pot. Cover them with 2 inches of water (about 1 quart for 1 cup of dried chickpeas). Add 1 tablespoon kosher salt (or half that amount of table salt). Cover and bring to a simmer. Simmer for 10 minutes, remove from the heat, and cool for 1 hour. Drain in a colander, and rinse well.
- Cook the chickpeas. Place the rinsed beans back into the same heavy bottomed pot. Add enough water or broth to cover them by at least 3 inches. Stir in 1 teaspoon kosher salt or ½ teaspoon table salt for every cup of dried chickpeas you're cooking. Add herbs, chiles or mirepoix for infusing flavor, if using.
- Remove foam. Bring the pot to a boil, and then reduce to a simmer. Foam may develop in the first 20 minutes of simmering, and sporadically while the beans cook. Remove this by skimming the top of the water with a large spoon.Tip: Place a small bowl of water next to the stove. After skimming some foam off the top, dip the spoon into the bowl of water. This easily removes the foam from the spoon.
- Cook on the stovetop or in the oven. Either continue to simmer on the stovetop until the chickpeas are tender, or cover and slide the pot into a 350˚F preheated oven to continue to cook.The oven method creates a more even cooking since all surfaces of the pot are evenly heated. The cooking time will be approximately the same.The length of time will depend on the age of the dried chickpea and whether you pre-soaked them overnight. Heirloom beans, which tend to be fresher, should be ready after 90 minutes. Store-bought chickpeas may be older, and may therefore take longer to soften. Allow for up to 20% additional simmering time.Check the post (above) for cook times for Overnight Soak and No Soak.
- Check bean for doneness: Spoon out a bean and cut it in half. It should be firm but tender, and a consistent color and texture through the thickness of the bean. Or bite into it.
- Final soak. When the chickpeas are done, turn the stove off, cover the pot, and allow the chickpeas to completely cool in the leftover broth. This last soak adds flavor and promotes a creamy texture. Drain and discard vegetables added for flavor.(If using the oven method, remove the pot from the oven, keep it covered, and allow the chickpeas to completely cool before draining.)
- Store. Completely cool, and refrigerate in jars for up to 4 days. Or freeze up to 6 months in a freezer-safe container.Before freezing, be sure the beans are completely cooled and dry. You can dry them be either 1) using a towel, 2) leaving them out to dry naturally, or 3) placing them in a warm oven. Note: If you use a towel, it will remove some of the skins. This is perfectly normal and nothing to worry about. Just discard the skins.
- Pro-Tip: Use any cooking liquid remaining at the end of cooking for a base for making vegetable broth.
Ang Paris
So many great tips! I've been intimidated by chickpeas and this helps so much - thank you for this 🙂
The Wimpy Vegetarian
You are so welcome! Once you make them a couple of times, you'll see how easy it is 🙂
Eileen
I just love all the tips to make great chickpeas. I never thought to add baking soda and I'm excited to try it. My family eats a lot of chickpeas from snacks to dinners.
The Wimpy Vegetarian
I am the total chickpea queen, and have tried just about everything through the years. I hope these tips work for you!
Amira
As a girl from the Middle east we use chickpeas a lot, and I mean a lot not just in falafel but cooked chickpeas has a special place in our kitchens and traditions. Although I grew up eating this in one form or the other on a weekly basis I did not know about these varieties. Thank you so much for such informational post! I love it.
The Wimpy Vegetarian
Thank you so much Amira. I eat a lot of chickpeas in lots of ways. When I was in Israel and Jordan recently, I had so much fantastic falafel, and want to try to duplicate it. But like you, I use chickpeas (and chickpea flour) in lots and lots of recipes.
Sue Ringsdorf
Gosh, so many great tips for making chickpeas! Your stovetop method worked beautifully for me. Thanks so much!
The Wimpy Vegetarian
Thank you so much for letting me know!! I'm happy this method worked so well for you!
Jennifer
So many great tips and tricks! I love chickpeas and use them often but have never tried them from dried before. What a money saver too!
The Wimpy Vegetarian
I think the flavor is so much better when I cook them from dried. I highly recommend them over canned.
Lynn
These tips were so great! Thanks so much!
The Wimpy Vegetarian
You're so welcome!
lynn
We are a bean-eating family, and chickpeas are high on the list. Thanks for all this great information!
The Wimpy Vegetarian
I am a self-confessed chickpea addict!
Julie
What a wonderful resource! I've never cooked dried chickpeas but have experience with beans so know how much better these will be!
The Wimpy Vegetarian
They are sooooo much tastier than canned, IMO. And I can infused flavors into them too.
Michaela
Foolproof is right! This is the first recipe/tips I have found that helped me make these with 100% success!
The Wimpy Vegetarian
Yay! I'm so happy to hear that!
Kathleen
A neighbor gifted me some chickpeas and found your recipe for how to cook. They came out perfect, now I've got it bookmarked for the future!
The Wimpy Vegetarian
Fabulous! I'm so happy they worked so well for you. Thanks for letting me know!
MS
I've messed up cooking chickpeas in the past so I decided to google and actually follow instructions on how to cook it correctly. Came out perfect! Wish I thought about doing this earlier. It was super easy too.
The Wimpy Vegetarian
That makes me so happy. Thanks for letting me know!
Susannah
I love chickpeas! This recipe was so easy to follow and I will be coming back to it again and again.
Jeff
Adding salt anytime before minutes before the beans are cooking makes them harder. Never add salt in soaking instructions or they will be hard. For the softest beans mix in some baking soda to the soaking process and then cook in about 1/2 tsp of baking soda. Add salt when beans are 80% finished.
The Wimpy Vegetarian
You can add salt when they're 80% finished if you want, but they'll be better if you soak the dried beans in a brine solution, and cook them from the beginning with salt. Both the flavor and texture will be better. If they don't soften, there's another reason for it. And I cover that in the post.
Many cooks believe what you say, though. There have been tests besides my 500 pots of beans I've made. And I've never yet had my beans refuse to soften because I used a brine solution and added salt before cooking. See this research that changed my mind several years ago on this: https://www.americastestkitchen.com/cooksillustrated/how_tos/5803-salty-soak-for-beans?ref=HowTo_browse_21 and https://www.seriouseats.com/baking-soda-brine-for-beans-5217841 and https://www.seriouseats.com/salt-beans-cooking-soaking-water-good-or-bad. I hope this helps answer your question.
And I should add that I've added baking soda to beans, but usually when I make hummus since it makes the beans super soft.